Learn about the basics of Mediaferry SmartDesign and SmartCorrect. You'll get details about the components of SmartDesign and how SmartDesign & SmartCorrect works for Print and Digital.
To get started, select the option from the list below:
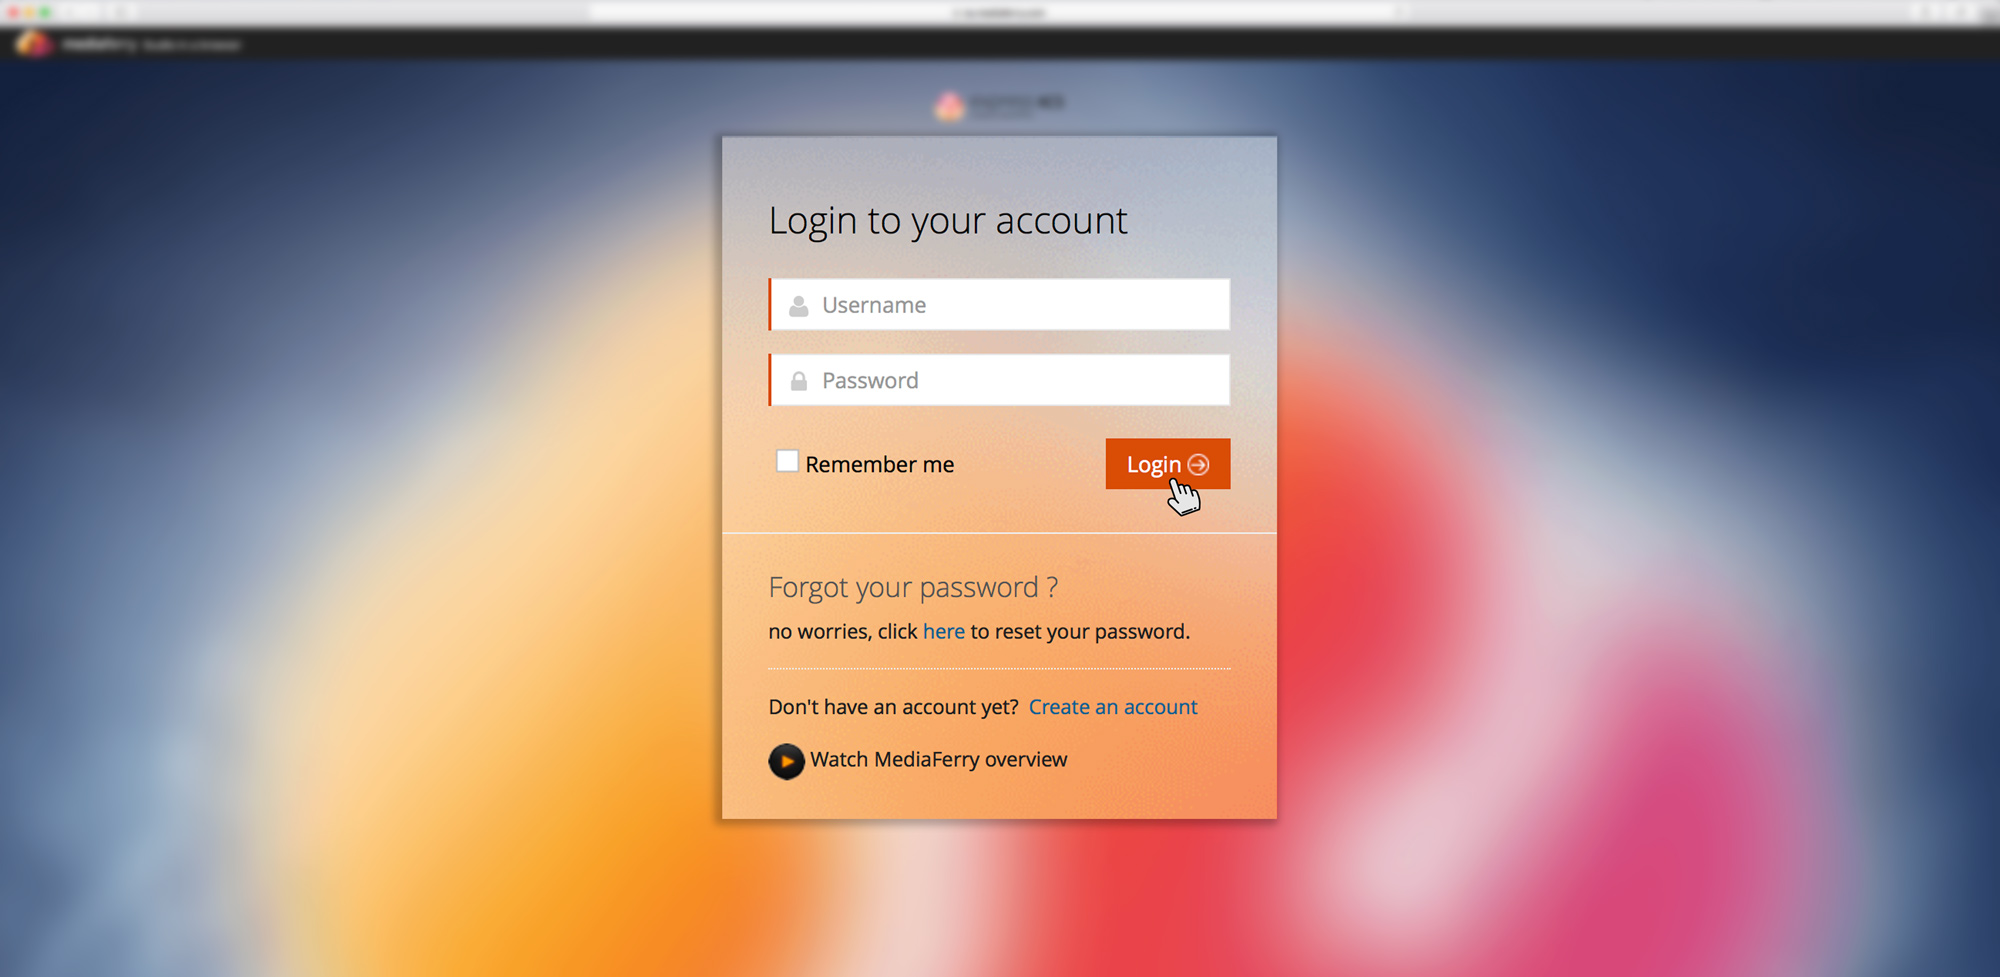
Open your Mediaferry URL in browser and log in with your login credentials.
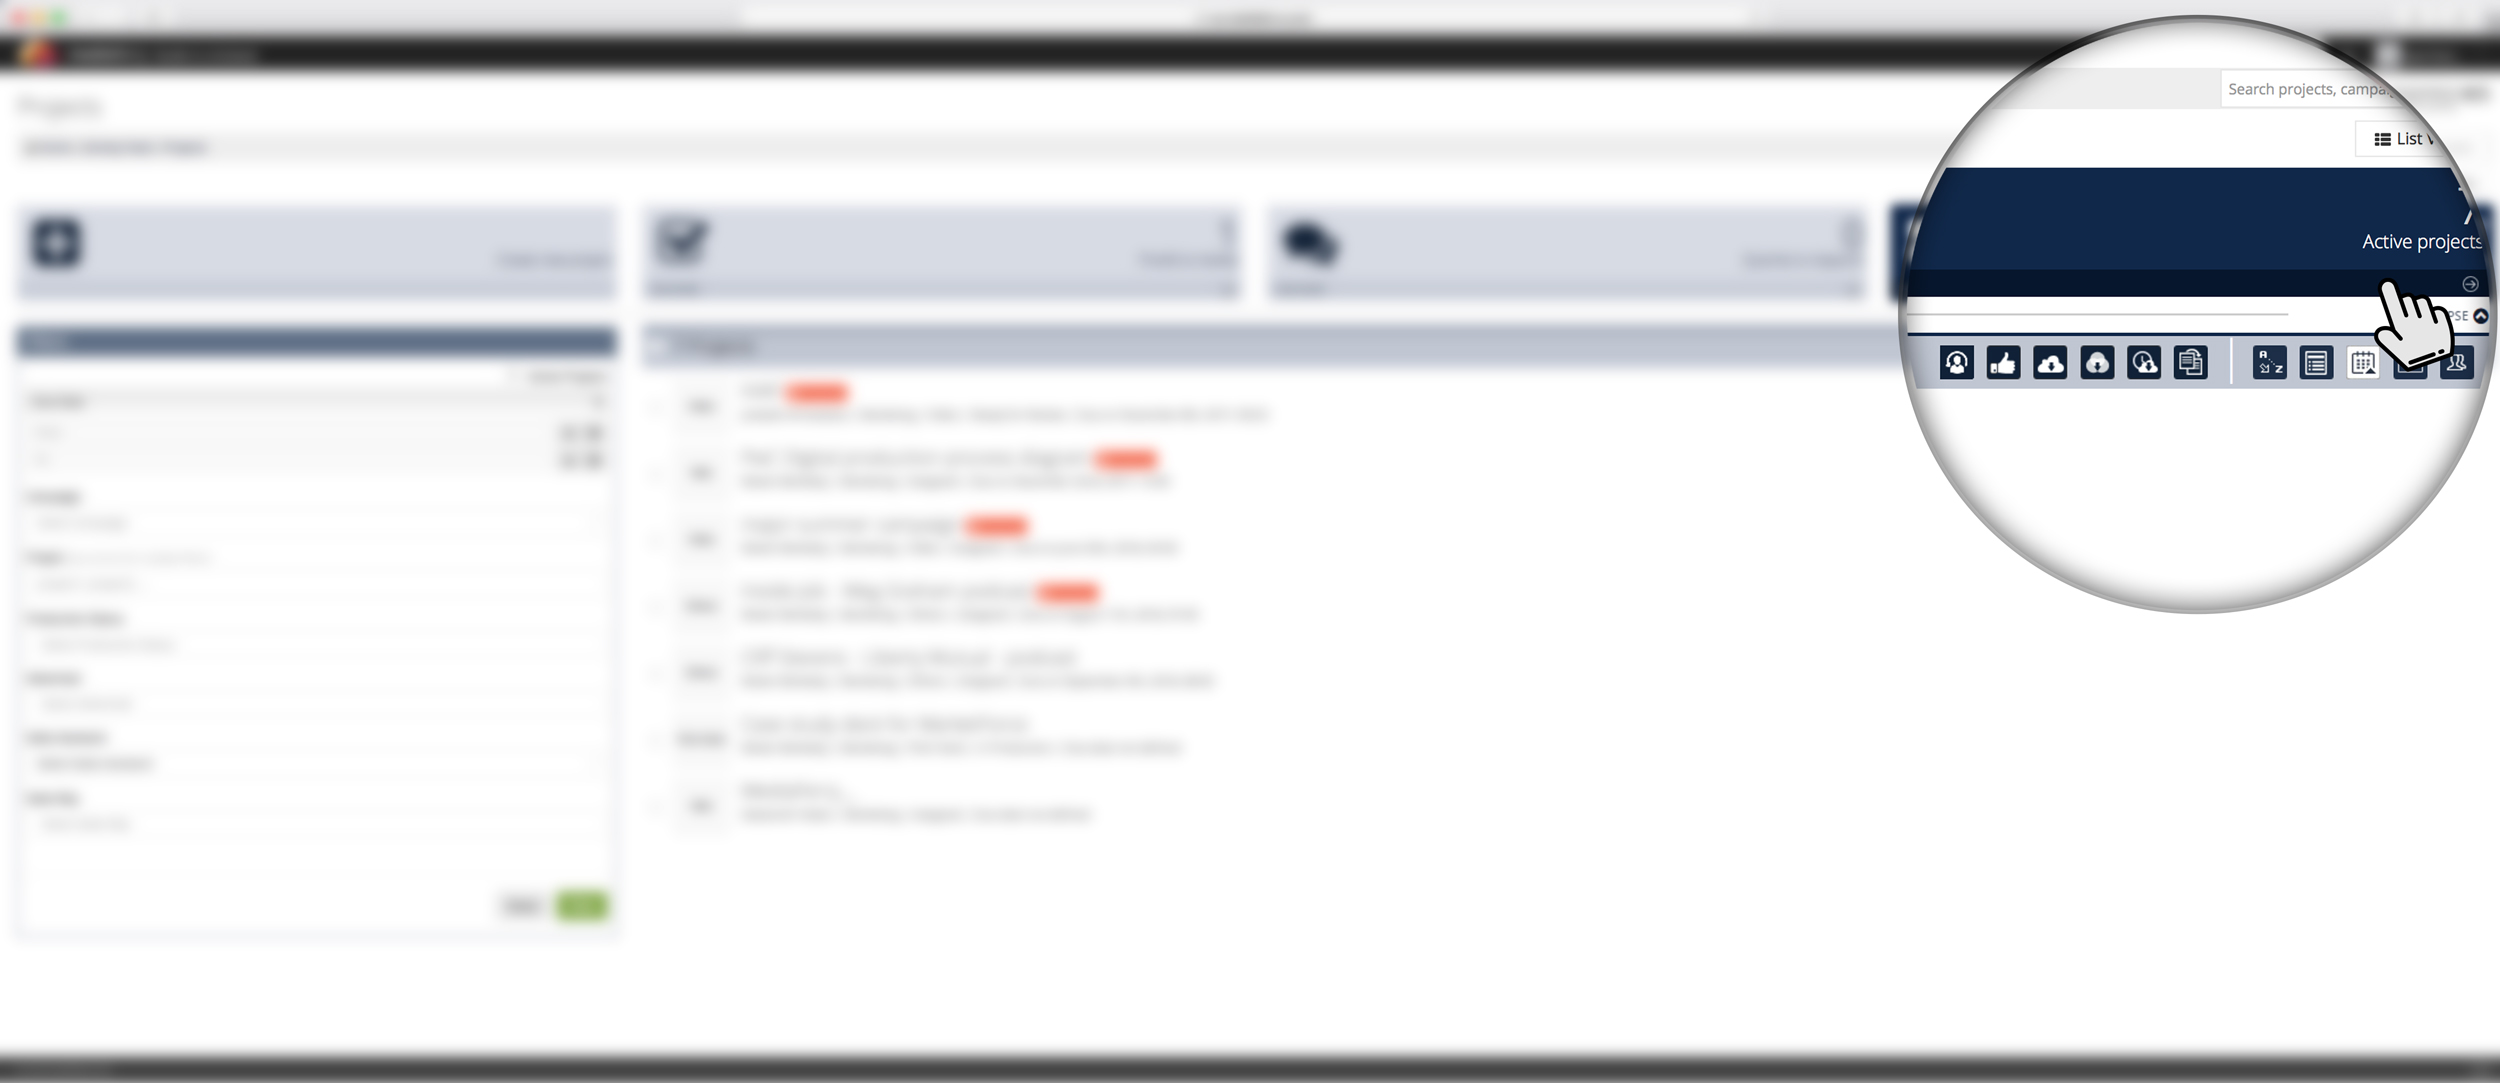
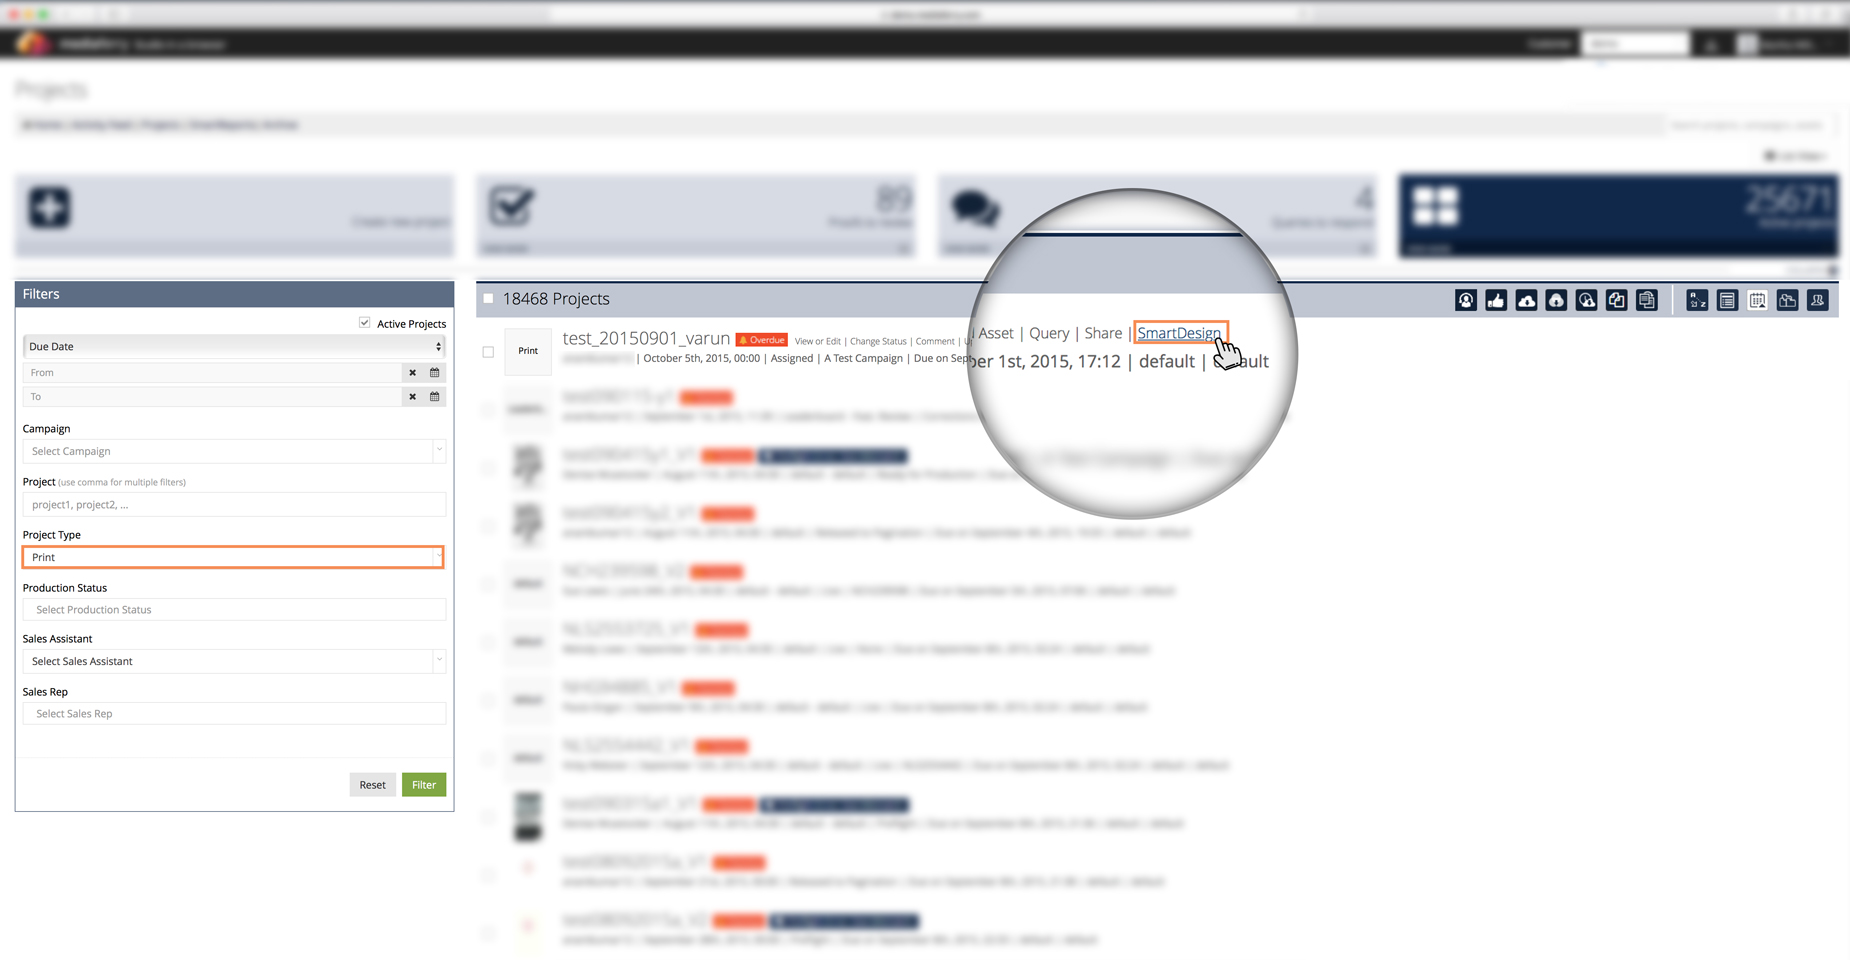
Go to active projects tab from the Mediaferry page menu to get list of your active projects.
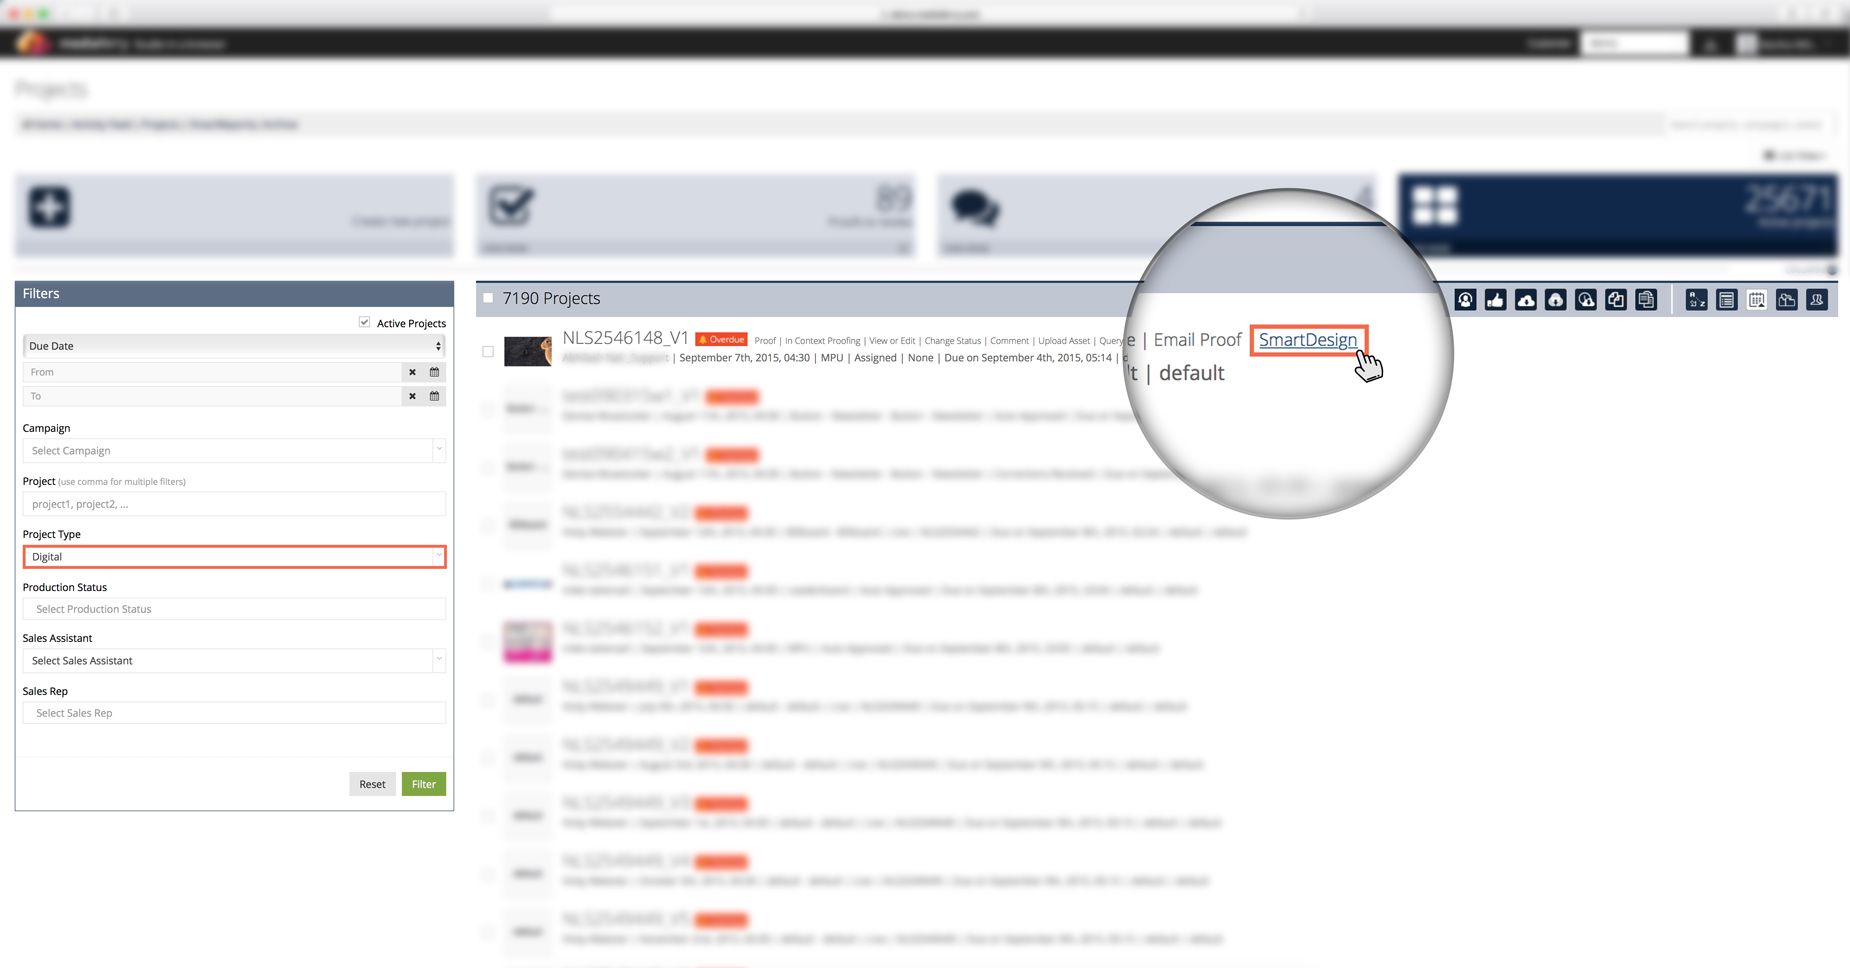
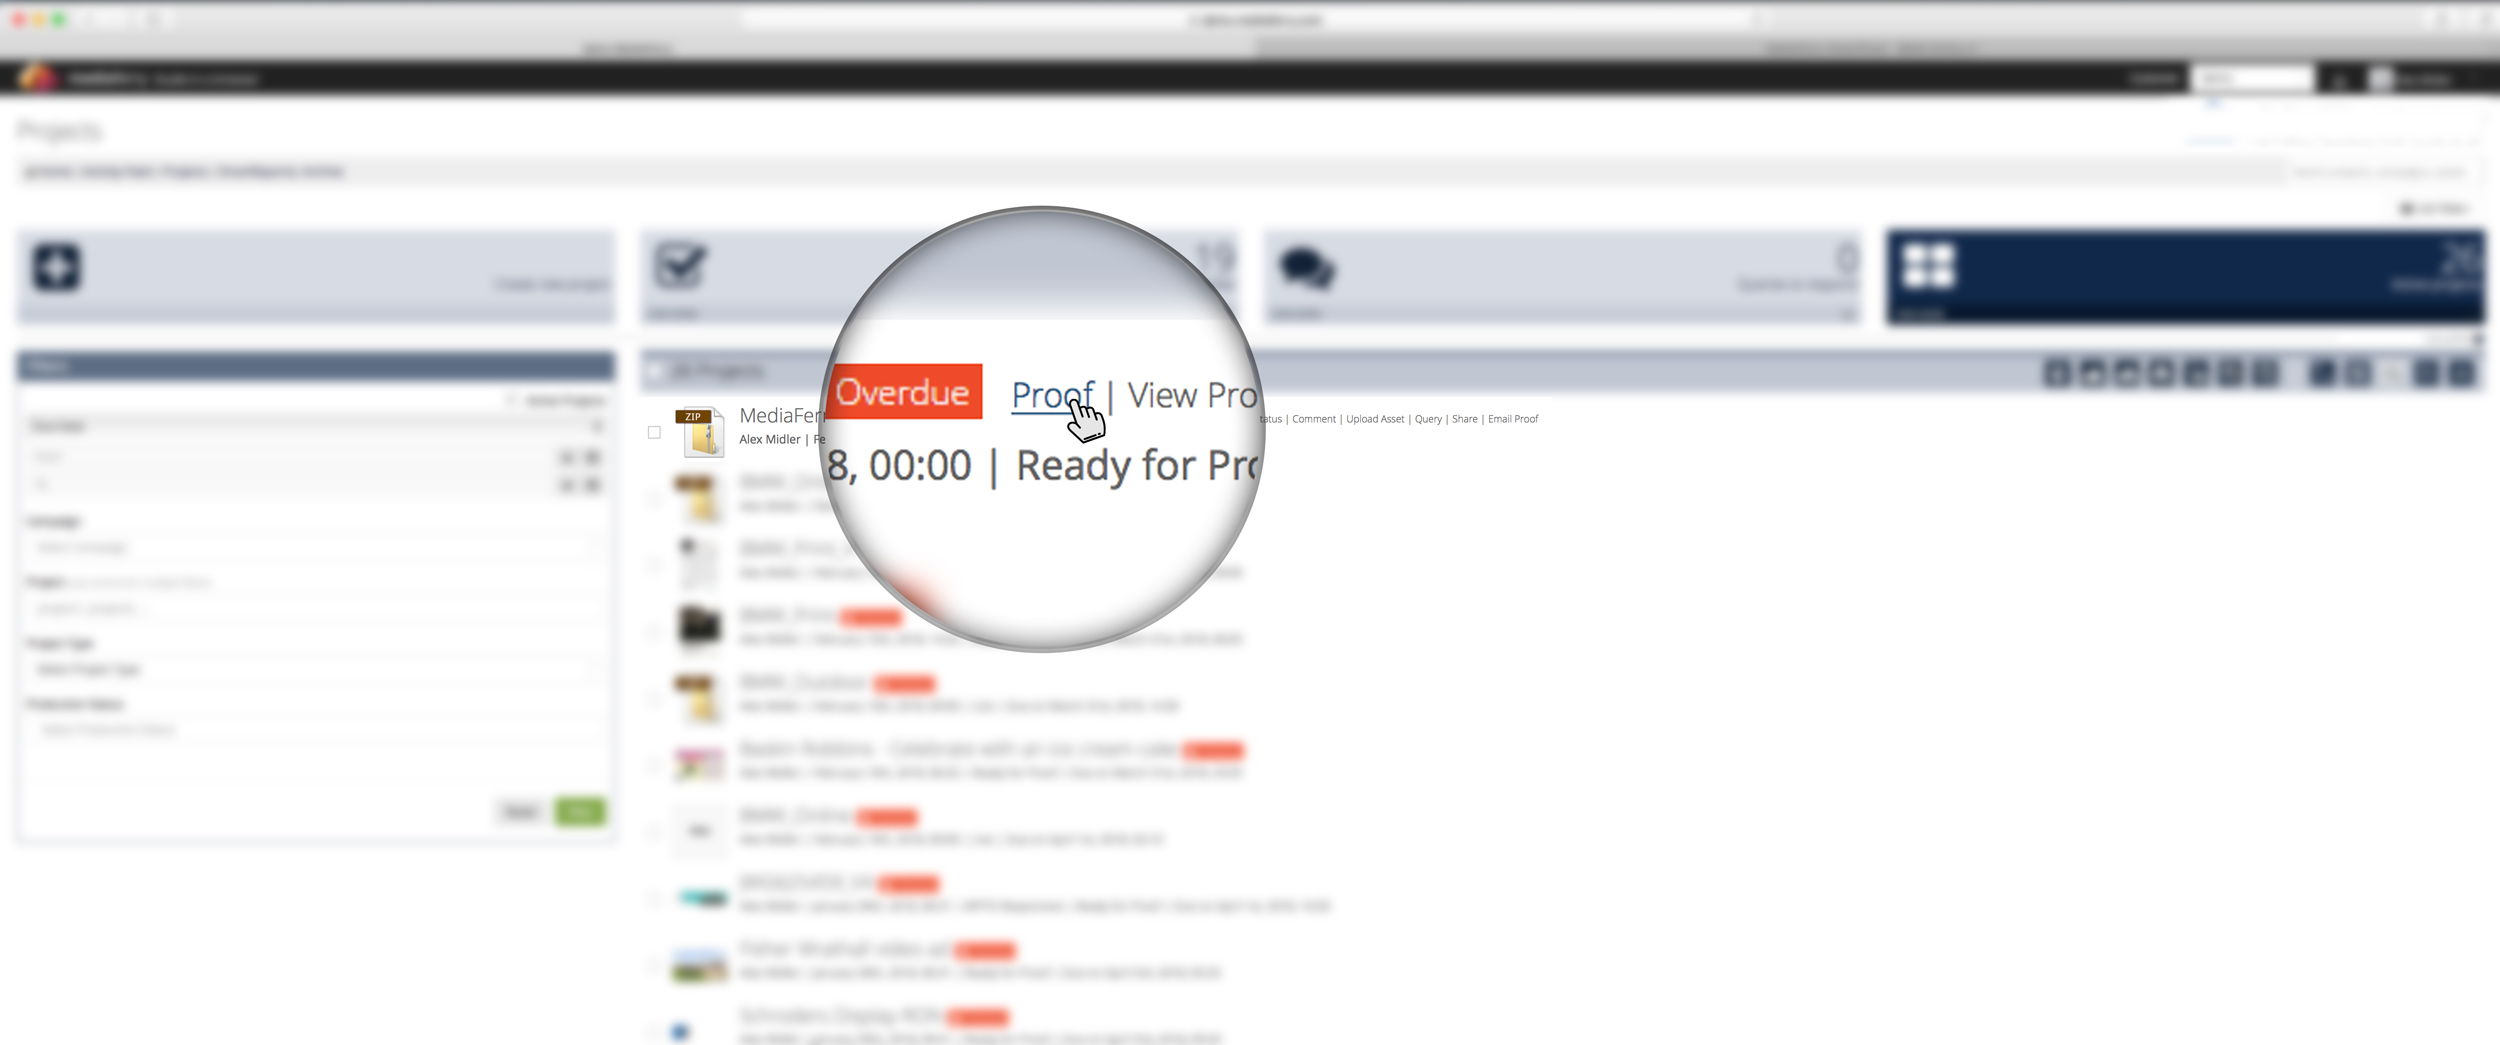
The list of active projects will open, mark project status as Digital in the Filters
form. As soon as the digital list appears, you can see SmartDesign button highlighted next to the project name. Click on the button
to use Mediaferry SmartDesign module.
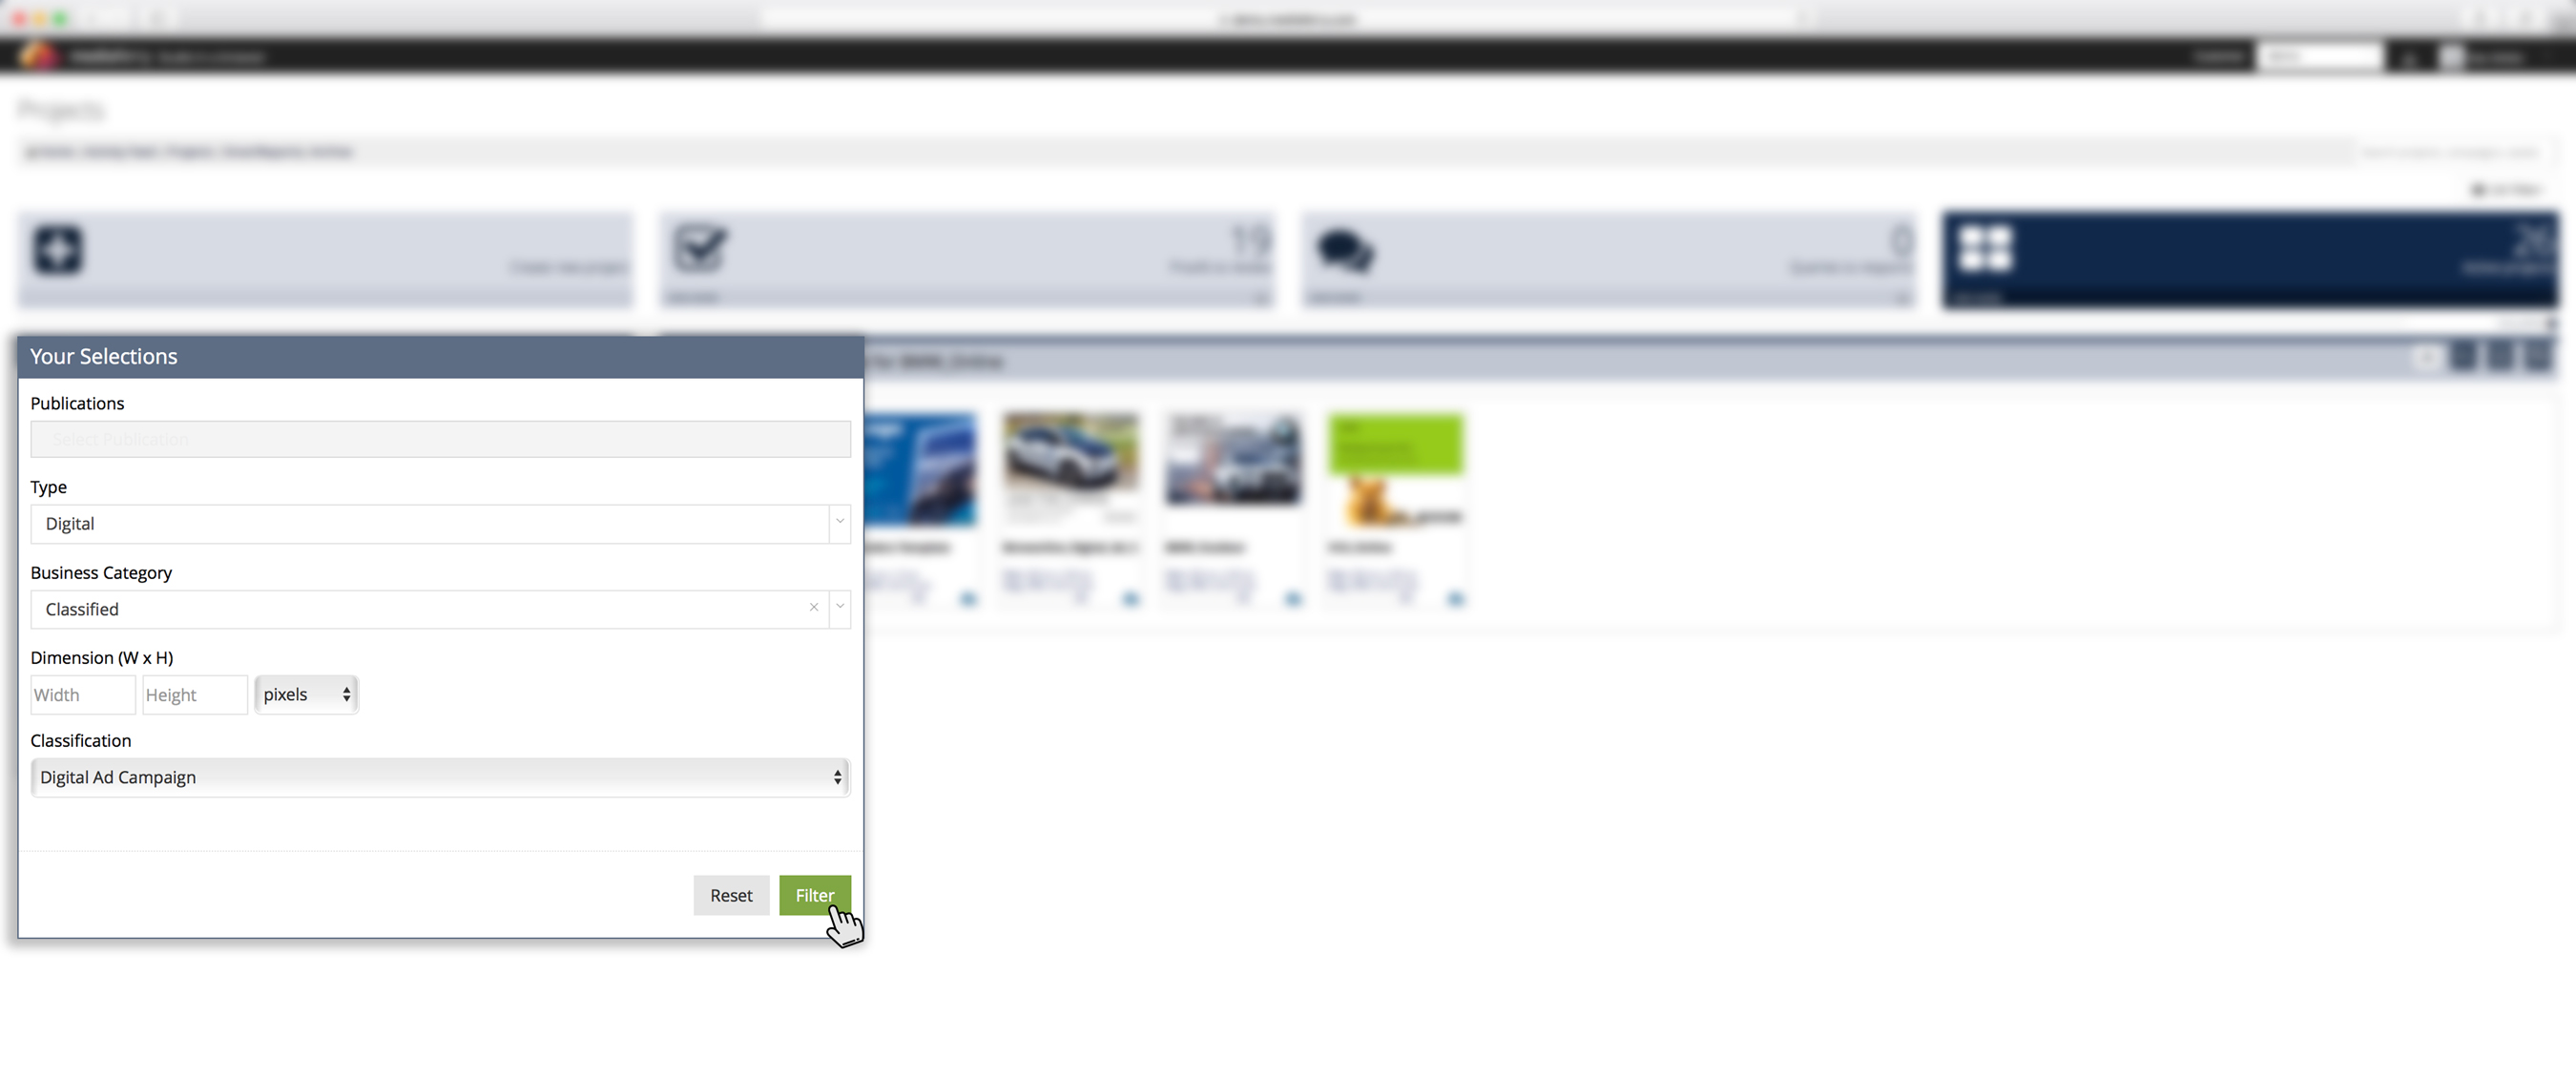
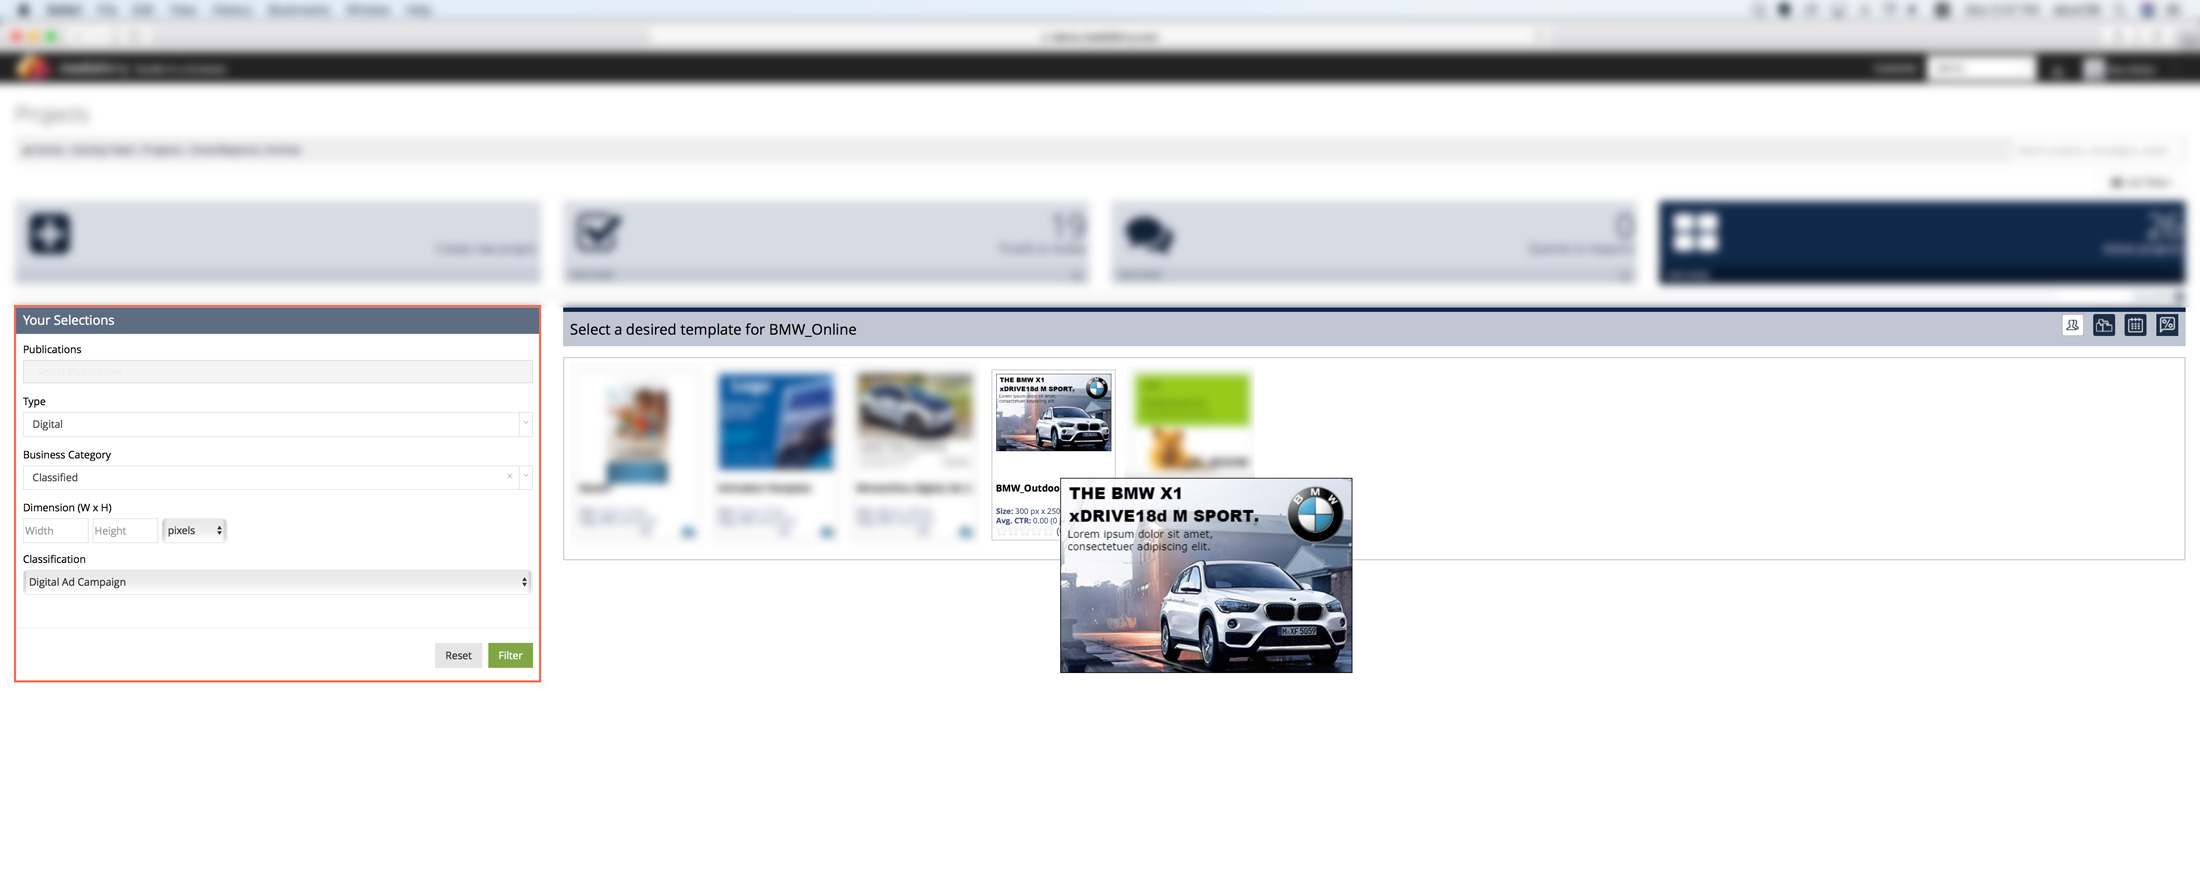
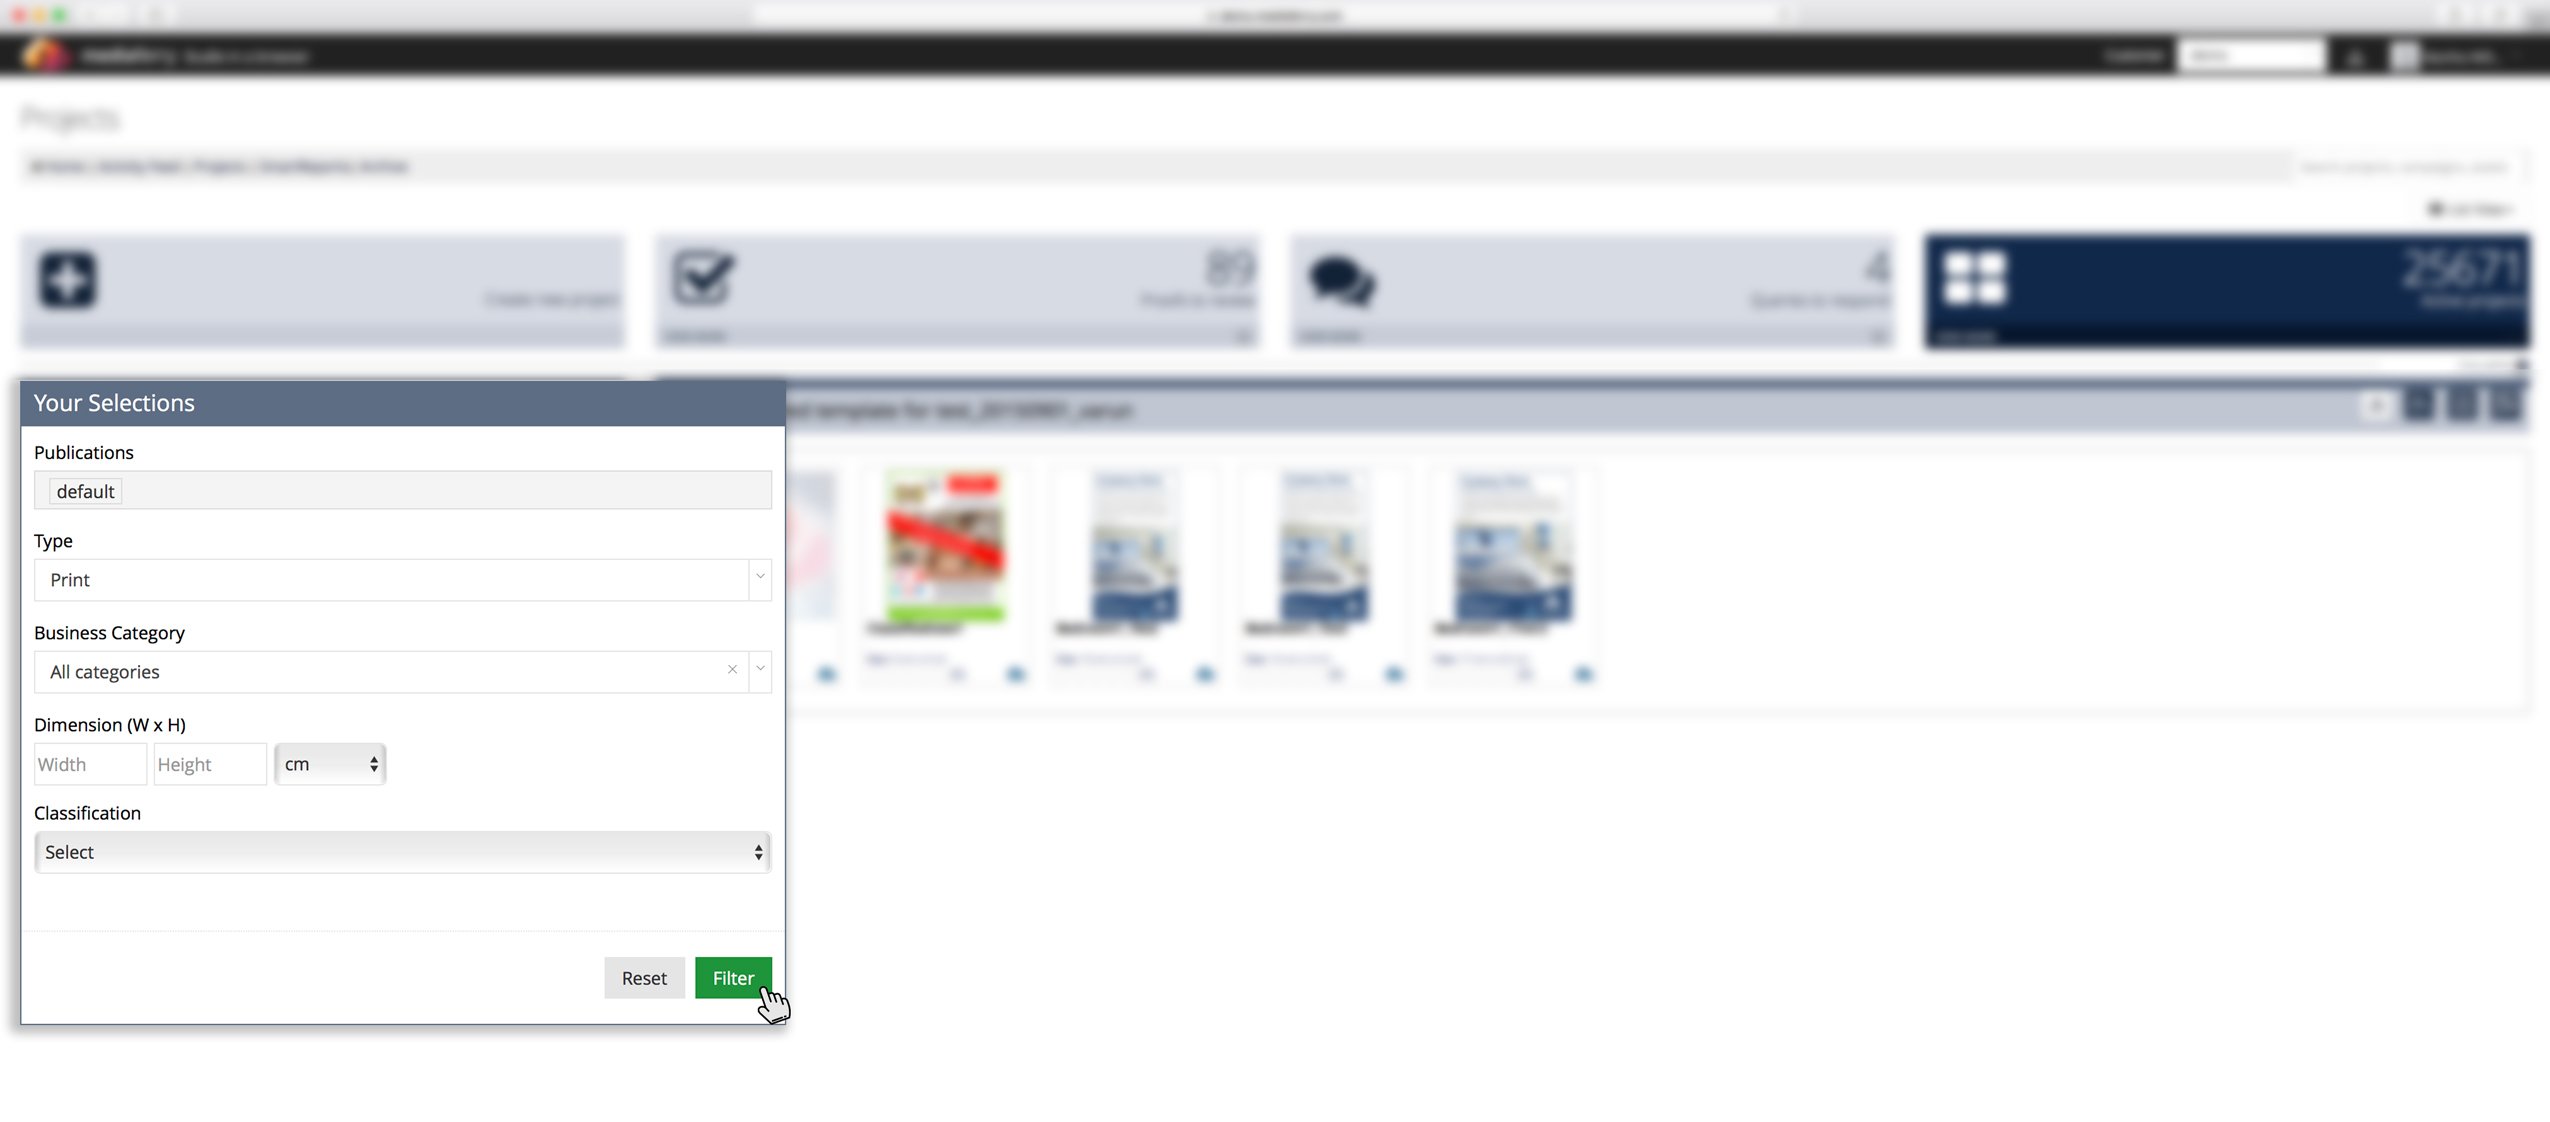
Once you click the SmartDesign button, the Your Selections form will open where you can filter digital
templates according to your preferred dimensions, business category, classification, etc.) from the Mediaferry template library.
As you click on Filter button, list of different pre-defined digital templates will open. From where you can select your preferred
template.
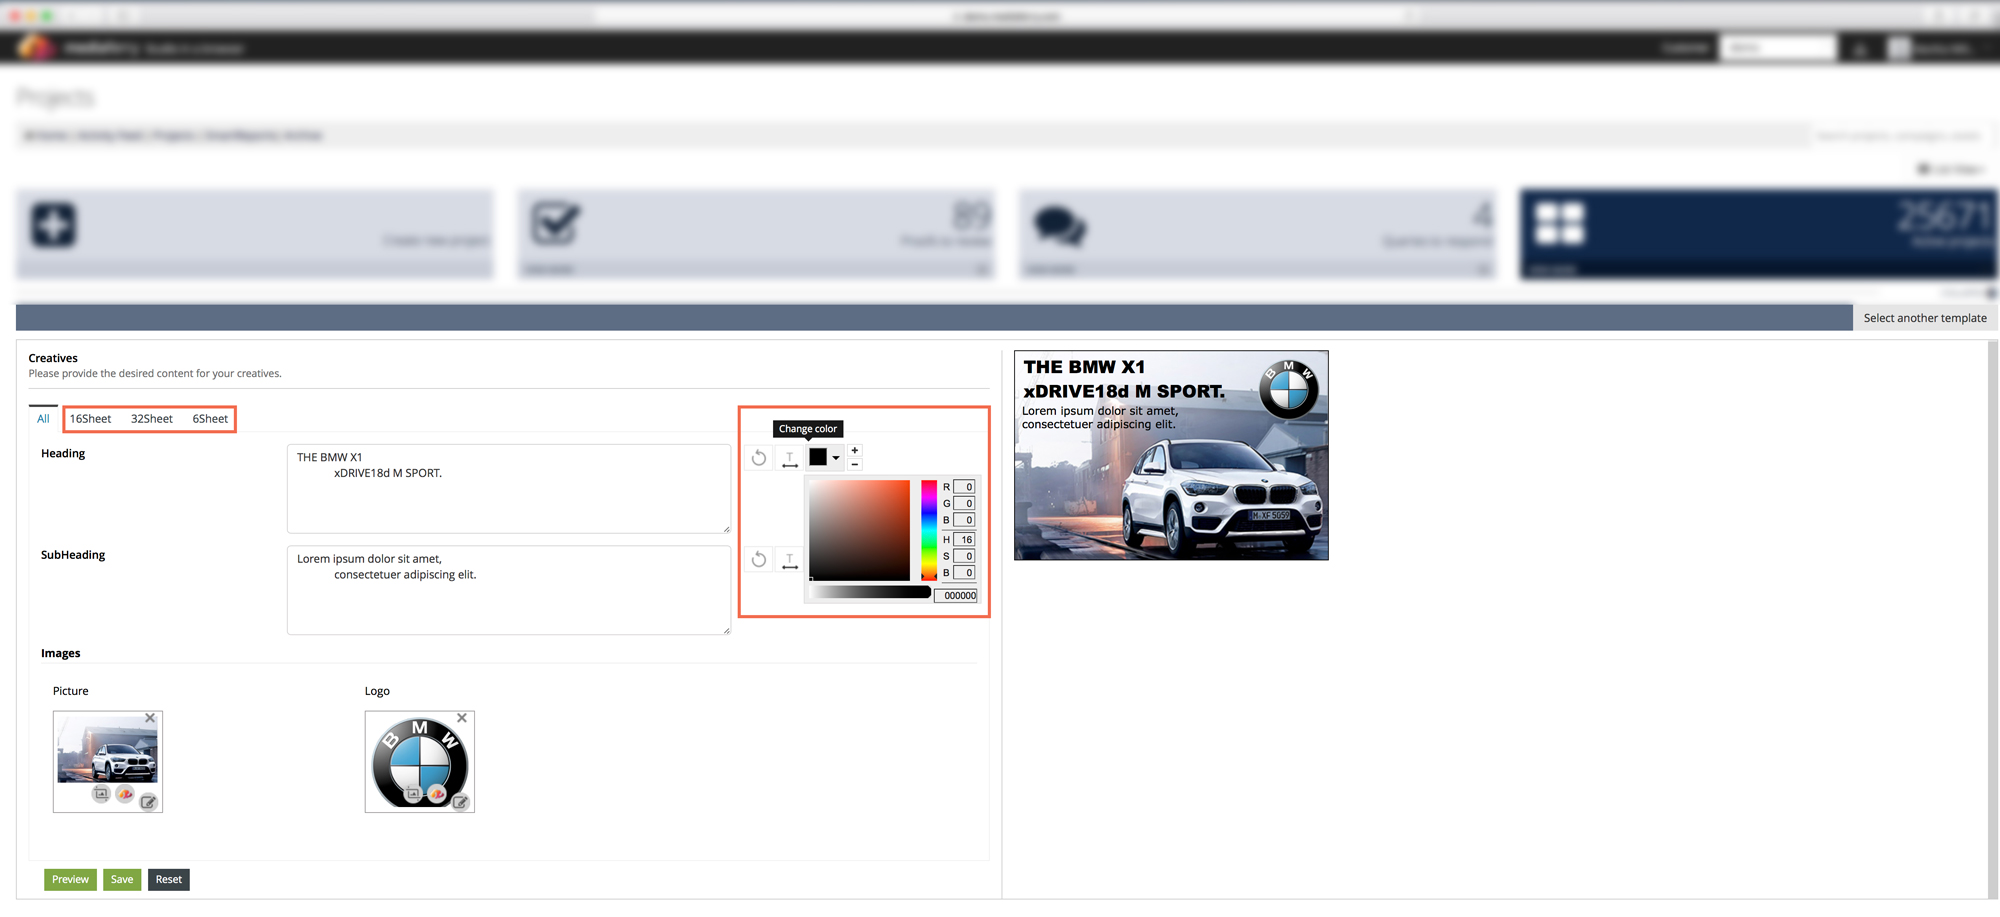
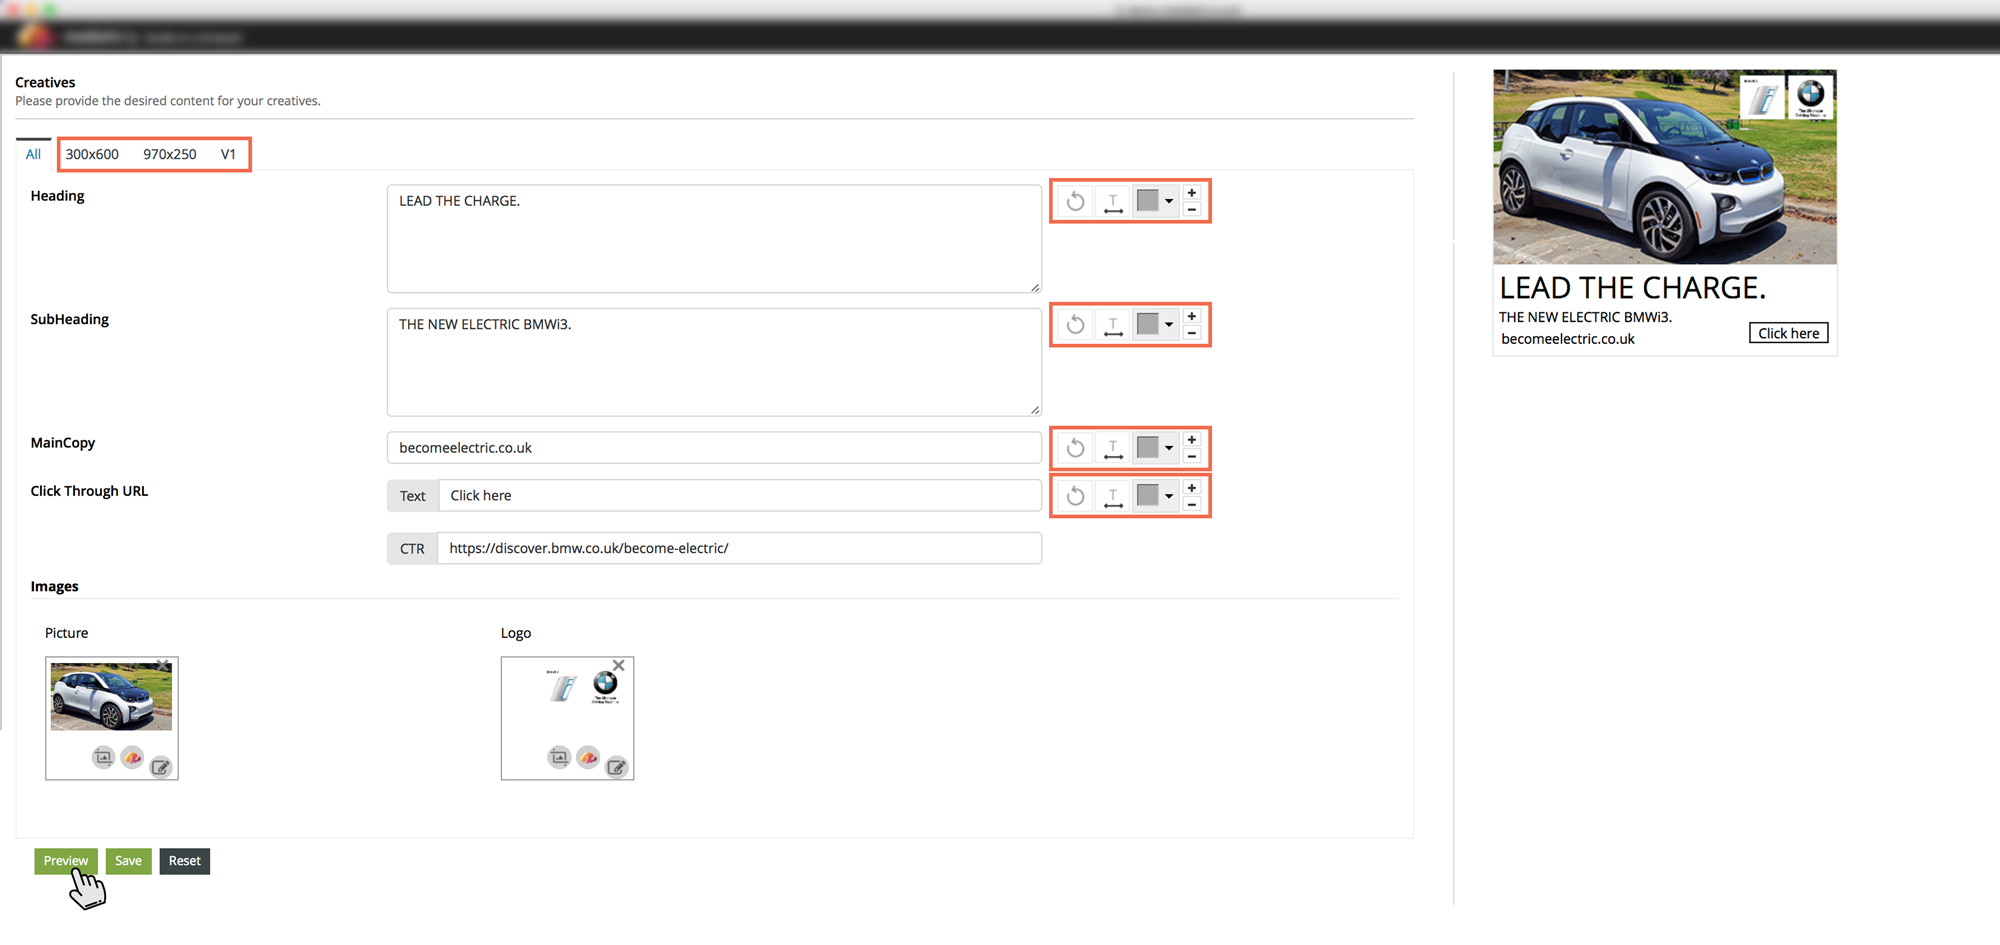
Shortly after selecting the template, the SmartDesign Editor page will open where you can make changes according to your requirement in the
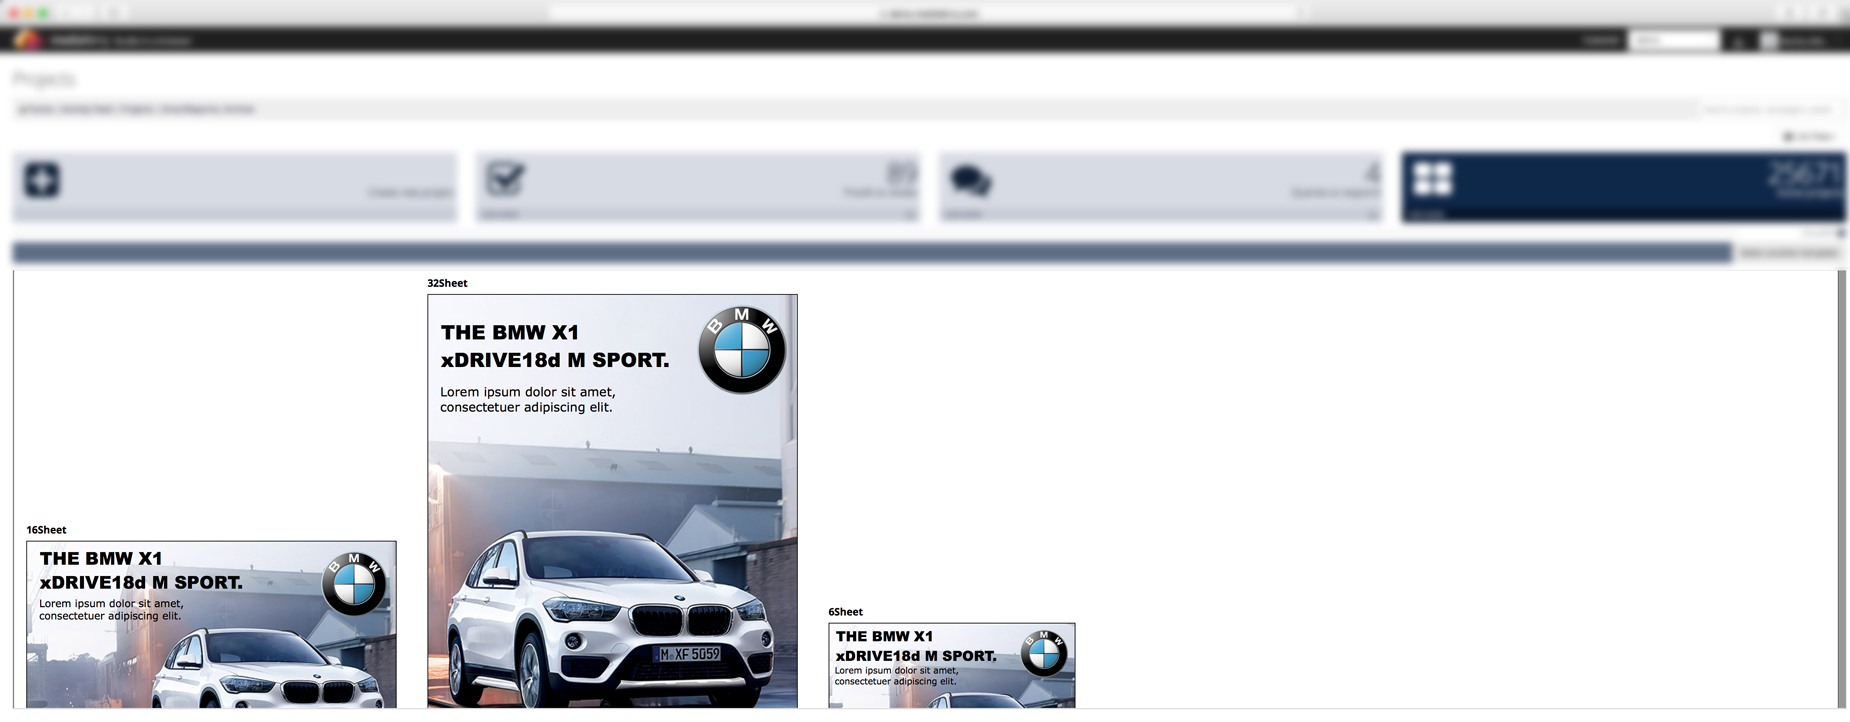
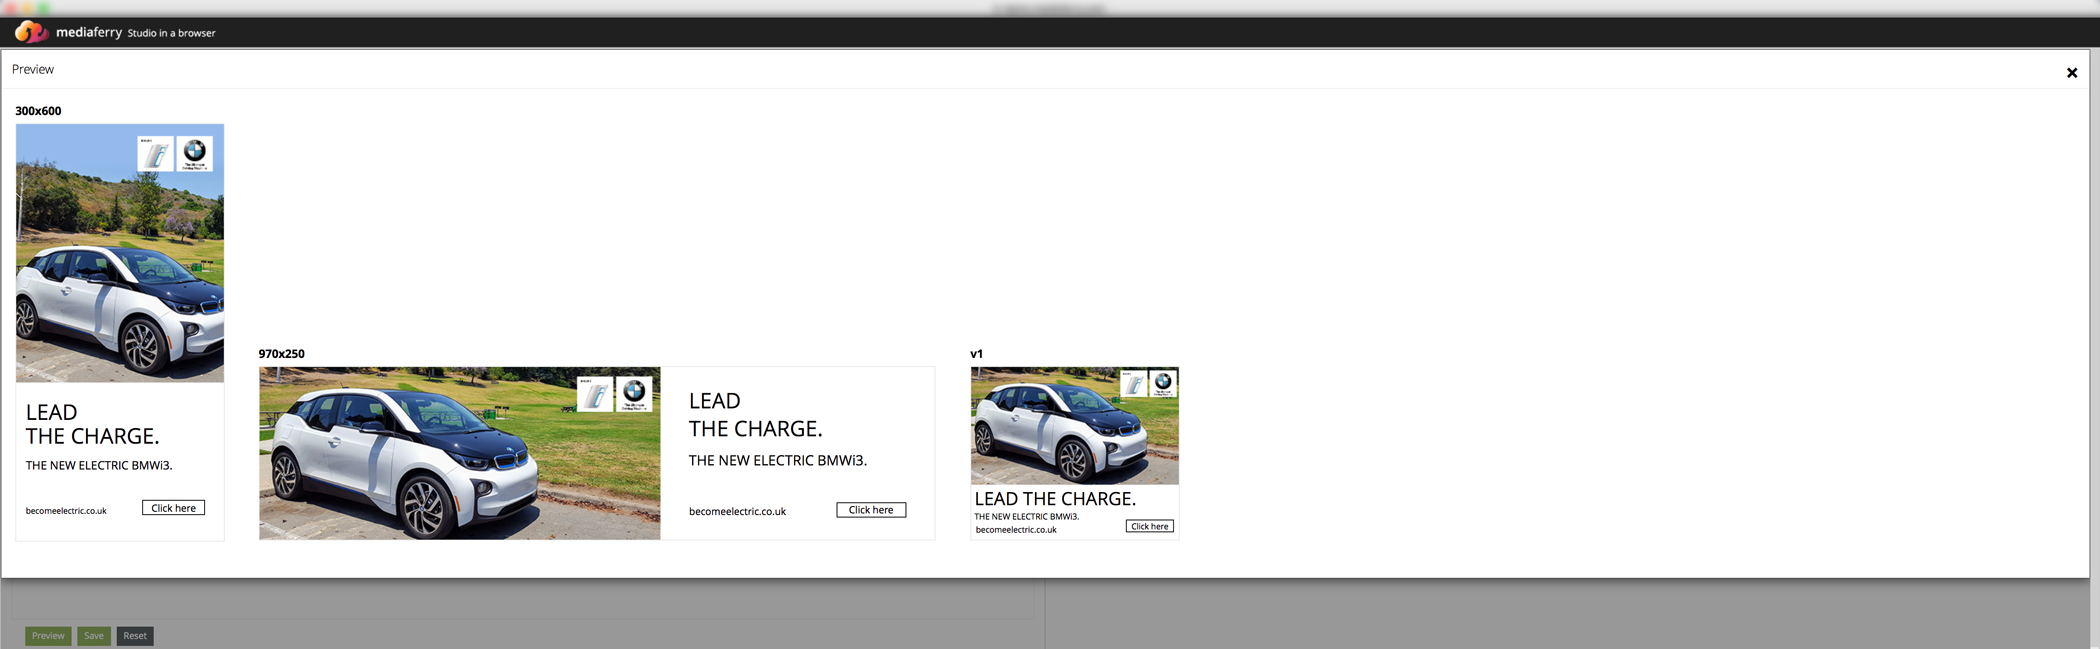
pre-defined template. Select multiple artwork sizes, upload logo/images, write your text, adjust font size, etc. And click Preview to preview the creatives.
If you are satisfied with the artwork previewed, click Save to export, else for changes go to Reset option
and proceed.
How to SmartDesign for print?
To create print design, click SmartDesign button highlighted next to the print project name.
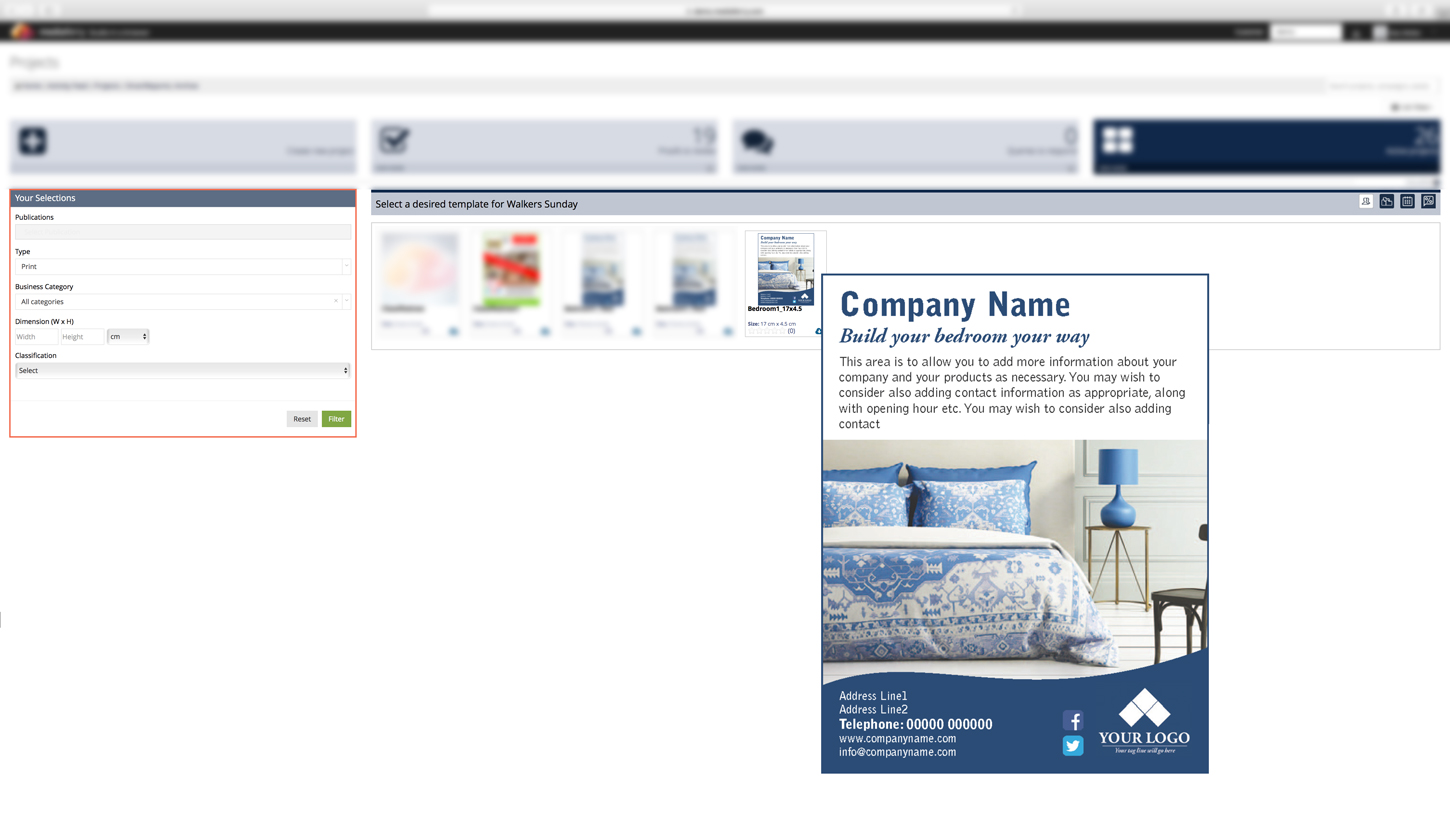
On click, Your Selections form will open where you can filter print templates from the Mediaferry template library for Print
artworks. Once you are done with Your Selections form, click on Filter button to get template.
On click, several pre-defined print templates will open. Select your preferred one by just clicking on it.
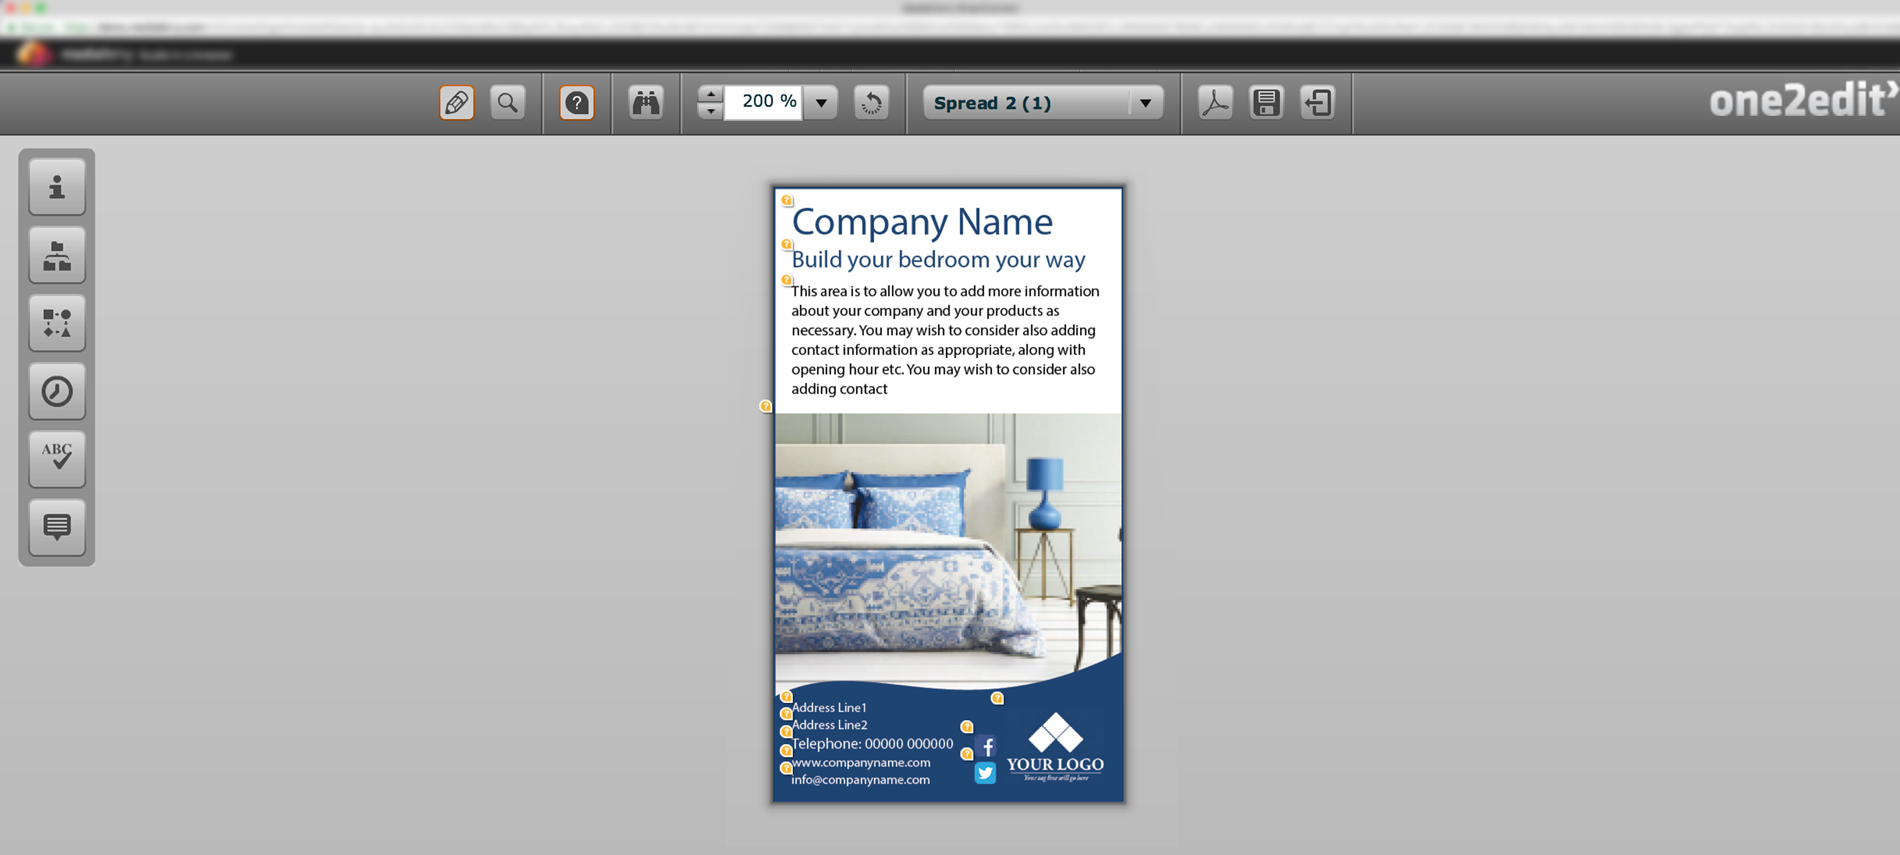
Template will open in One2Edit in a new window. Here you can update copy and image to create a new print artwork in no time.
Once your print creative is finished, select Save (at the center top of the window) to export the artwork, else for changes go to Reset option
and proceed.
Note: In order to use Mediaferry SmartDesign for Print your browser must support Adobe Flash, for an seamless experience of
One2Edit server.
How to use SmartCorrect for digital?
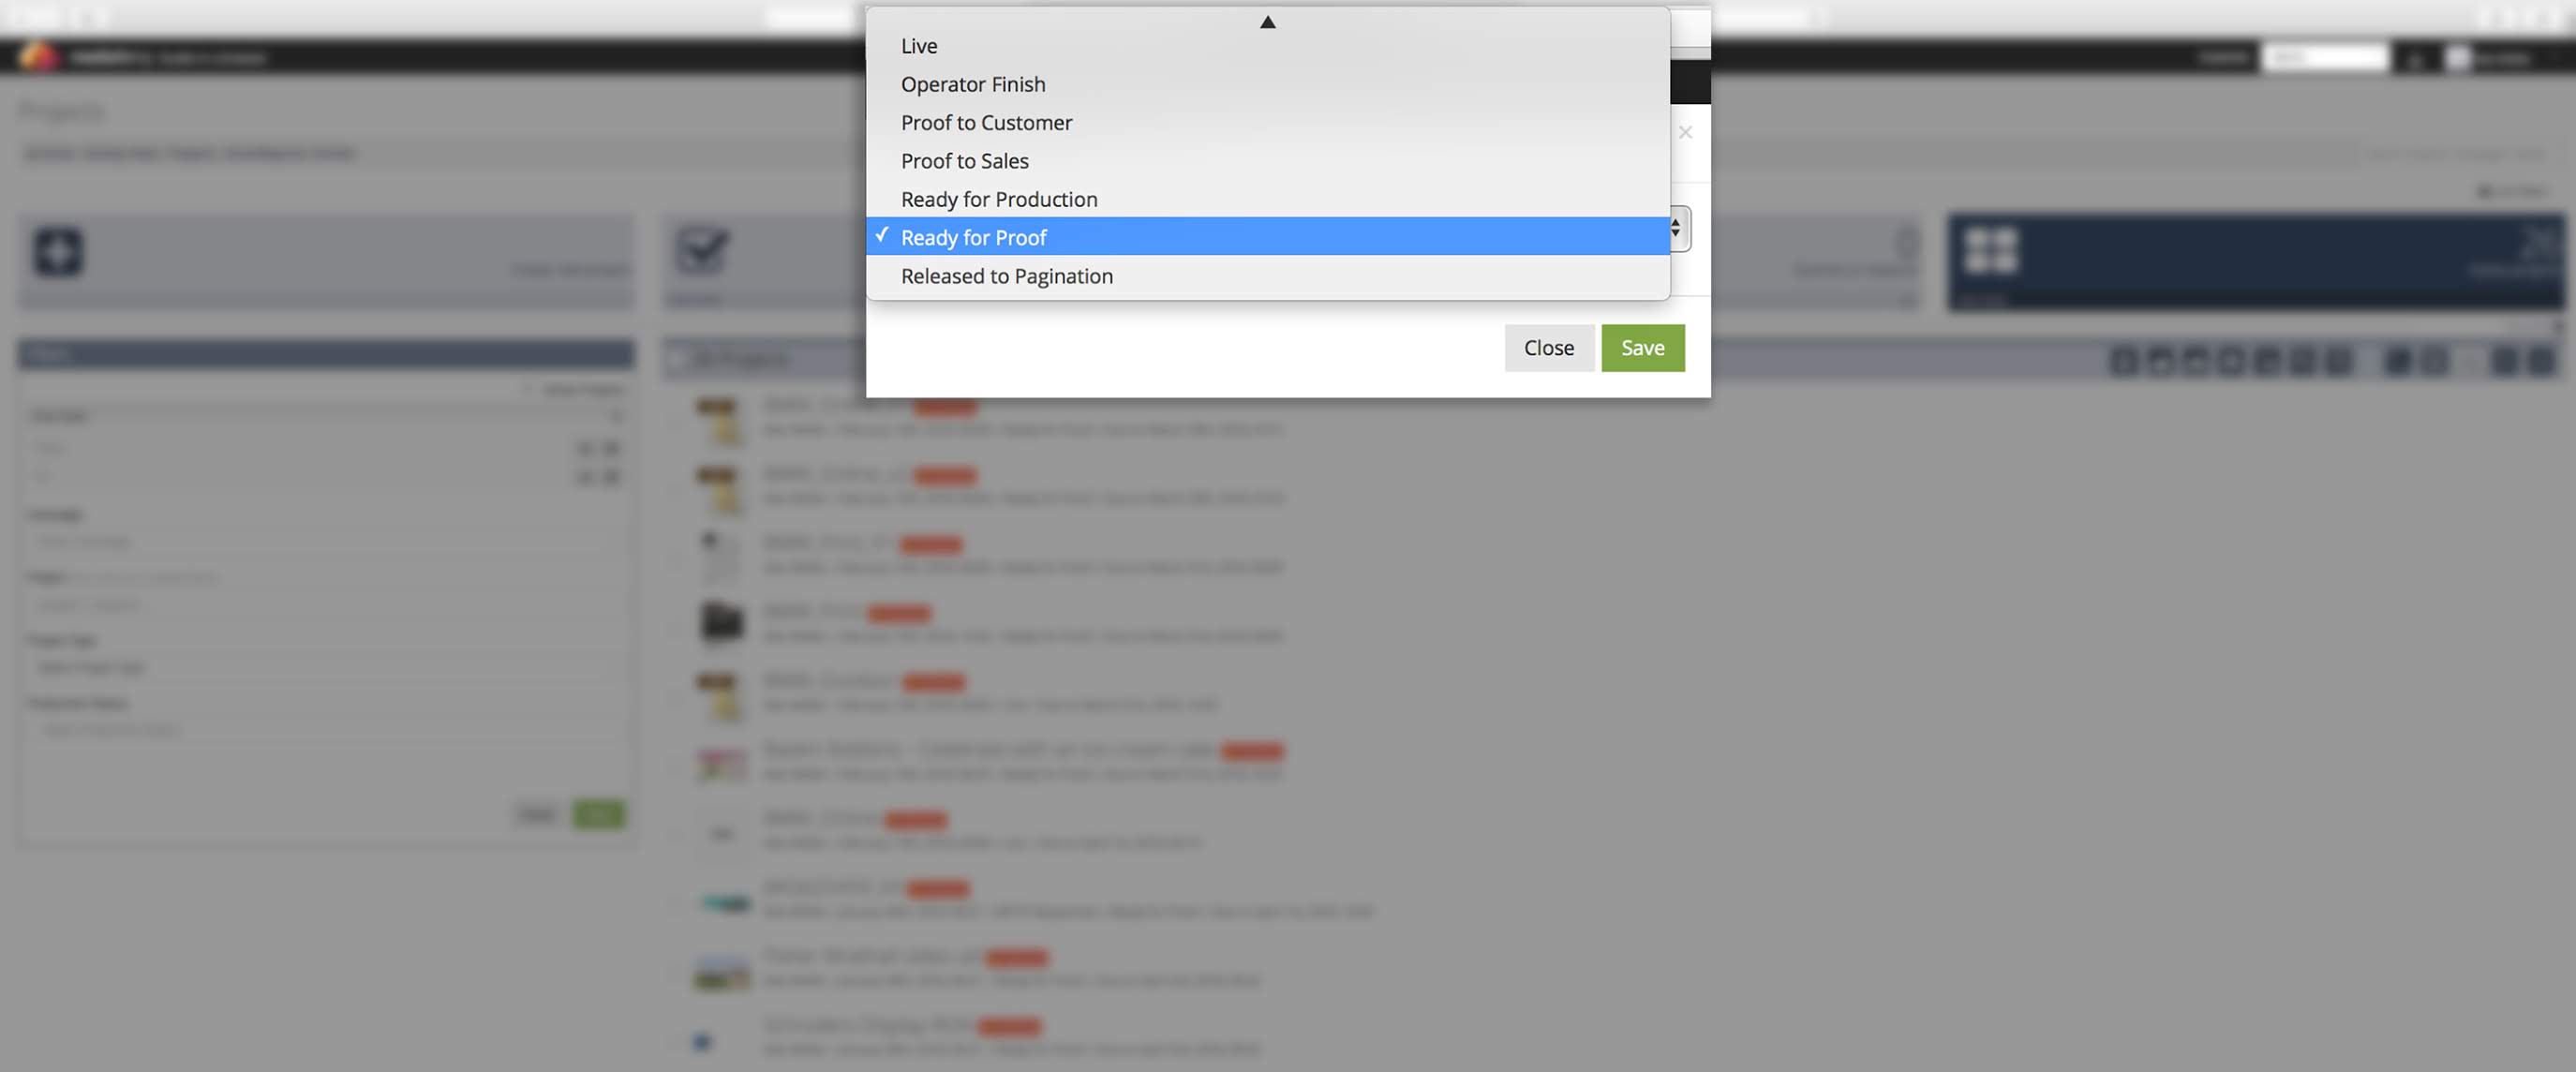
Once your artwork is finished, change the status to Ready for Proof as project with ready for proof will enable the proof option.
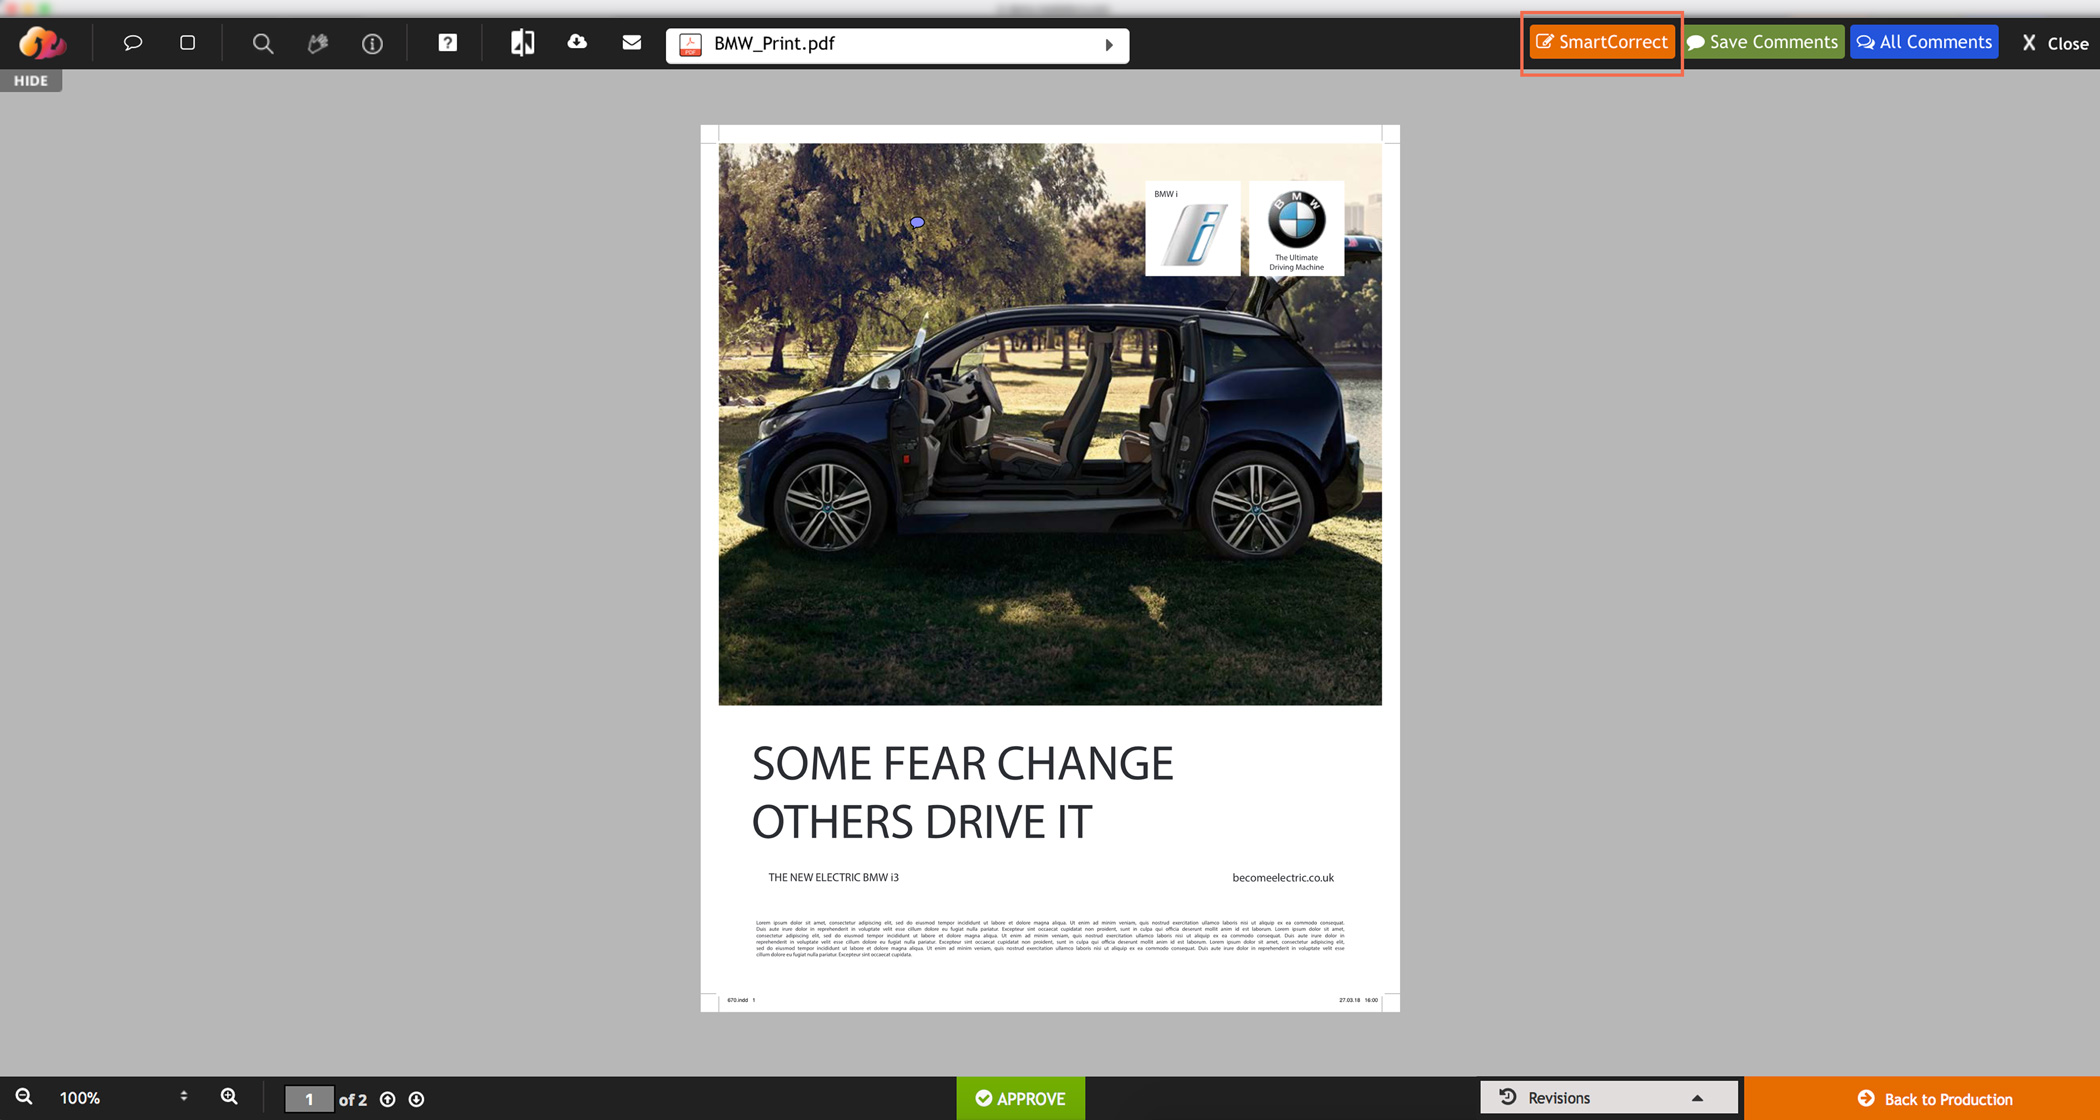
Click proof to open artwork pdf in SmartProof, highlighted next to the project name.
On click, the proof will open in new window shortly. Select SmartCorrect enabled on the top right side of the screen to make
on the go changes.
On click, Mediaferry SmartCorrect window will open. You can change Text Formats, Character styles, Images, etc. but template couldn't be changed.
If the creative is created in multiple sizes, you can make changes separately. Once you are done with the changes, click
preview to preview the changes.
If satisfied with the changes, click save to save the updated file.
How to use SmartCorrect for print?
As soon as your print creative is ready to be sent for proofing, change the status to Ready for Proof to get the proof option enabled.
To open creative pdf in SmartProof, select proof button.
The creative will open in proofing window. If you are not satisfied with the proof, then no worries, you can make on the go changes. To make changes, select SmartCorrect
highlighted on the top right side.
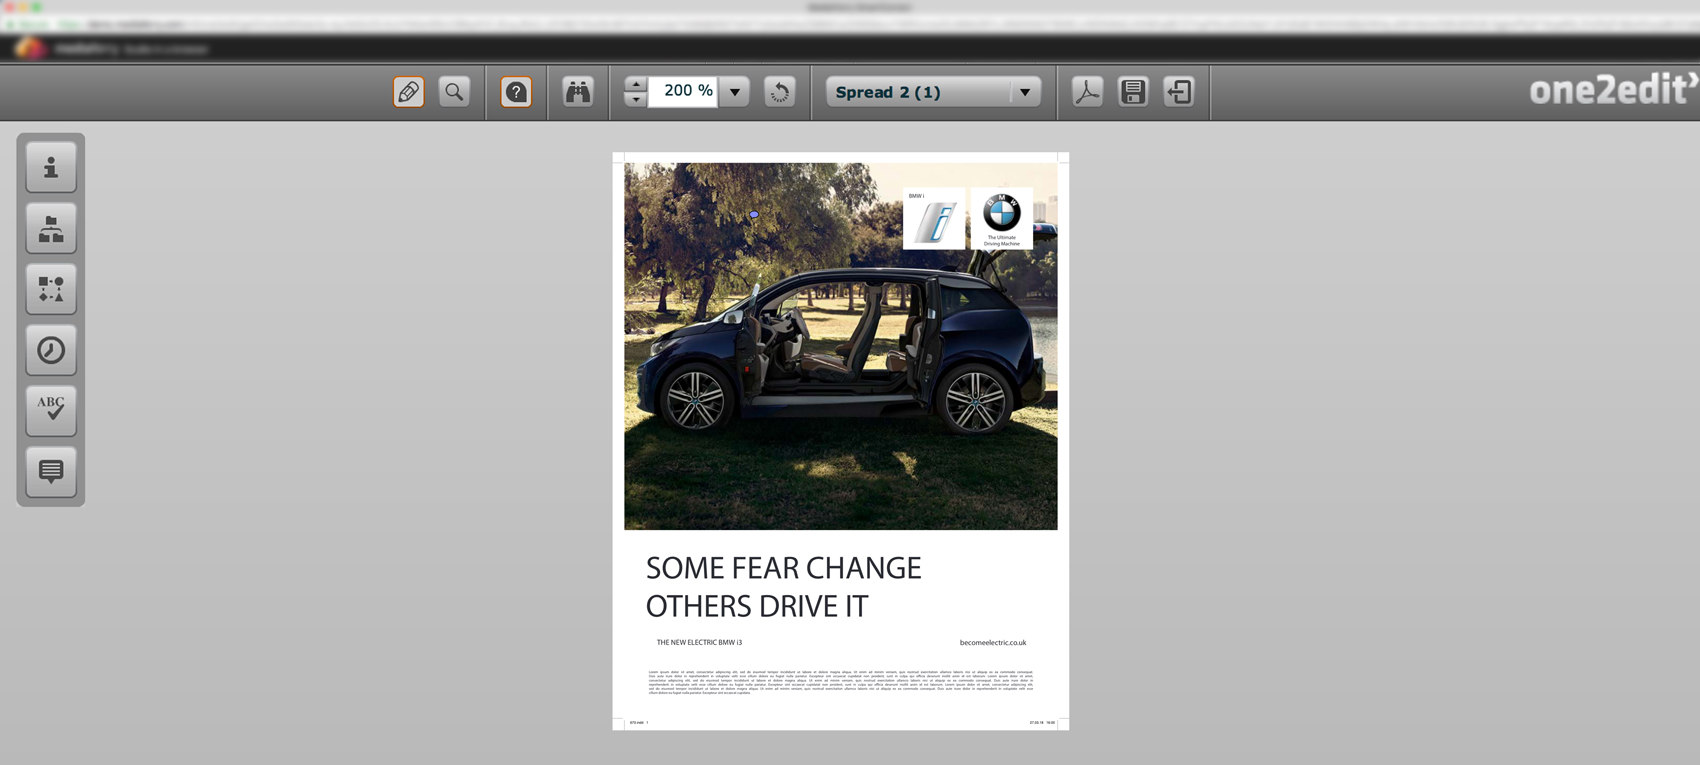
On click, the proof will open in One2Edit sever where you can make changes accordingly, such as you can change Text Formats,
Character styles, Images, etc.
Once you are done with the required changes, save the updated file by selecting save icon highlighted at the top left of the window.
On click, a Mediaferry pop-up will appear asking either the file needs to be Overwritten* or a new version should be created, do your required action.
Once changes get saved, proof back in Mediaferry to review the updated proof!
Note: To support One2Edit server, your browser must support Adobe Flash for SmartCorrect for Print.
Need more help on SmartDesign & SmartCorrect?
Please fill out the form below for additional support regarding this training module.